Introduction
So, you’ve decided to grow your own cannabis—congratulations! Whether you’re looking to cultivate premium flowers for personal use, explore a rewarding new hobby, or simply want complete control over what you consume, growing cannabis at home is an incredibly fulfilling journey.
The good news? Growing cannabis isn’t as complicated as you might think. While there’s definitely a learning curve, thousands of first-time growers successfully harvest quality buds every year. With the right information, quality seeds, and a bit of patience, you can join them.
In this comprehensive guide, we’ll walk you through everything you need to know to grow cannabis successfully—from choosing your first seeds to harvesting your final product. Let’s get started!
Why Grow Your Own Cannabis?
Before we dive into the how-to, let’s talk about why growing your own cannabis makes sense:
Complete Quality Control: When you grow your own, you know exactly what goes into your plants. No mystery pesticides, no questionable growing practices—just pure, organic cannabis grown your way.
Significant Cost Savings: While there’s an initial investment in equipment, growing your own cannabis is far more economical than buying from dispensaries long-term. A single plant can yield several ounces of premium flower.
Strain Selection: Access to rare and exotic strains that might not be available at your local dispensary. Want to grow that legendary strain you’ve heard about? Now you can.
Personal Satisfaction: There’s something incredibly rewarding about nurturing a plant from seed to harvest and enjoying the literal fruits of your labor.
Step 1: Understanding the Basics – What Cannabis Plants Need
Cannabis is surprisingly resilient, but like any plant, it has specific needs to thrive:
Light
Cannabis plants need plenty of light to grow strong and produce potent buds. Outdoors, the sun provides everything your plants need. Indoors, you’ll need to invest in quality grow lights. During the vegetative stage, plants need 18-24 hours of light per day. During flowering, they need 12 hours of light and 12 hours of complete darkness.
Water
Cannabis plants need consistent watering, but overwatering is one of the most common beginner mistakes. The key is to water thoroughly but infrequently—wait until the top inch of soil is dry before watering again.
Nutrients
Like all plants, cannabis needs nutrients to grow. The three main nutrients are:
- Nitrogen (N): For vegetative growth and healthy leaves
- Phosphorus (P): For root development and flowering
- Potassium (K): For overall plant health and disease resistance
During vegetative growth, plants need more nitrogen. During flowering, they need more phosphorus and potassium.
Air Circulation
Good airflow prevents mold, strengthens stems, and helps regulate temperature. Whether growing indoors or outdoors, ensure your plants have adequate ventilation.
Temperature and Humidity
Cannabis thrives in temperatures between 70-85°F (21-29°C) during the day and slightly cooler at night. Humidity should be 40-60% during vegetative growth and 40-50% during flowering.
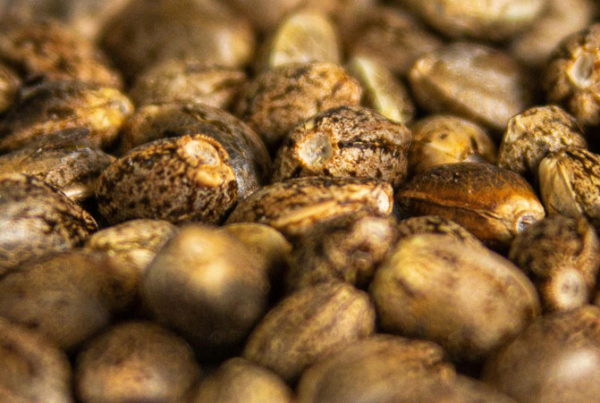
Step 2: Choosing Your First Cannabis Seeds
Your grow journey starts with selecting the right seeds. Here’s what you need to know:
Types of Cannabis Seeds
Feminized Seeds: These produce only female plants (the ones that grow buds). For beginners, feminized seeds are ideal because you won’t waste time and resources on male plants.
Autoflowering Seeds: These automatically switch from vegetative growth to flowering based on age, not light cycles. They’re perfect for beginners because they’re:
- Faster to harvest (8-10 weeks from seed)
- Smaller and easier to manage
- More forgiving of light schedule mistakes
- Great for small spaces
Regular Seeds: These produce both male and female plants. While they’re popular with breeders, beginners should stick with feminized or autoflower seeds for simplicity.
Best Strains for Beginners
When choosing your first strain, look for varieties known for being hardy and forgiving:
- Northern Lights: Legendary indica strain, extremely resilient and low-maintenance
- Blue Dream: Popular hybrid that’s easy to grow with generous yields
- White Widow: Classic strain that thrives in various conditions
- Afghan: Robust genetics that tolerate beginner mistakes well
Pro Tip: Start with autoflowering feminized seeds for your first grow. They’re the most beginner-friendly option and will give you confidence for future grows.
Step 3: Deciding Where to Grow – Indoor vs. Outdoor
Indoor Growing
Advantages:
- Complete environmental control
- Year-round growing capability
- Privacy and security
- Protection from pests and weather
Disadvantages:
- Higher initial equipment costs
- Requires electricity for lights and ventilation
- More maintenance and monitoring needed
Best for: Those who want maximum control, live in unsuitable climates, or need discretion.
Outdoor Growing
Advantages:
- Free sunlight (no electricity costs)
- Natural environment produces robust plants
- Potential for larger yields
- Lower startup costs
Disadvantages:
- Weather-dependent
- Risk of pests and diseases
- Less privacy
- Limited to one growing season in most climates
Best for: Those with suitable outdoor space, favorable climate, and legal permission to grow outdoors.
Step 4: Germinating Your Cannabis Seeds
Germination is the process of sprouting your seeds. Here’s the most reliable method:
The Paper Towel Method (Most Popular)
- Prepare materials: Two paper towels, two plates, and your cannabis seeds
- Moisten paper towels: Dampen (don’t soak) the paper towels with distilled water
- Place seeds: Put seeds on one paper towel with about an inch of space between each
- Cover and seal: Place the second paper towel on top, then cover with the second plate to create a dark, humid environment
- Wait patiently: Place in a warm location (70-75°F). Check daily and keep moist
- Watch for taproots: In 24-72 hours, you’ll see white taproots emerging
- Plant carefully: Once taproots are 0.5-1 inch long, carefully transfer to your growing medium
Direct Soil Method
Simply plant seeds 0.5-1 inch deep in moist soil, cover lightly, and keep warm and moist. Seeds will sprout within 3-7 days.
Germination Tips:
- Use distilled or filtered water (not tap water with chlorine)
- Keep temperature consistent between 70-75°F
- Don’t let paper towels dry out, but don’t oversaturate
- Handle sprouted seeds very gently—the taproot is fragile
- Be patient—some seeds take longer than others
Step 5: The Seedling Stage (Week 1-3)
Once your seed sprouts, you’ve entered the seedling stage. Here’s what your baby plants need:
Light Requirements
Seedlings need 18-24 hours of light per day. If growing indoors, keep lights 2-3 feet away to prevent burning.
Watering
Water very lightly—seedlings have tiny root systems and can easily be overwatered. Use a spray bottle to mist the soil surface.
Temperature
Keep temperatures between 68-77°F with 60-70% humidity.
Watch For Problems
- Stretching: If seedlings are tall and spindly, they need more light (move lights closer)
- Yellow leaves: Could indicate overwatering or nutrient issues
- Falling over: Stems are too weak—add gentle air circulation
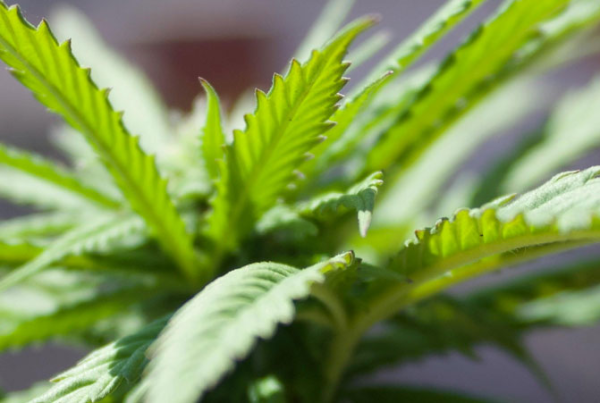
Step 6: The Vegetative Stage (Week 3-8)
This is when your plant focuses on growing big and strong. The vegetative stage typically lasts 3-8 weeks depending on the strain.
Light Schedule
Maintain 18-24 hours of light per day for photoperiod plants. Autoflowers will continue on their own schedule regardless.
Watering and Feeding
Your plant will drink much more now. Water when the top inch of soil is dry. Start introducing vegetative nutrients (high in nitrogen) at 25% strength, gradually increasing to full strength.
Training Techniques
Consider these beginner-friendly techniques to increase yields:
Low-Stress Training (LST): Gently bend and tie down branches to create an even canopy. This exposes more bud sites to light.
Topping: Cut off the top of the main stem to create two main colas instead of one. This increases yield but adds recovery time.
Common Vegetative Stage Issues
- Nutrient burn: Brown, crispy leaf tips indicate too many nutrients. Flush with plain water and reduce feeding.
- Nutrient deficiency: Yellow or discolored leaves may indicate lack of nutrients. Increase feeding gradually.
- Slow growth: Usually caused by inadequate light, wrong pH, or temperature issues.
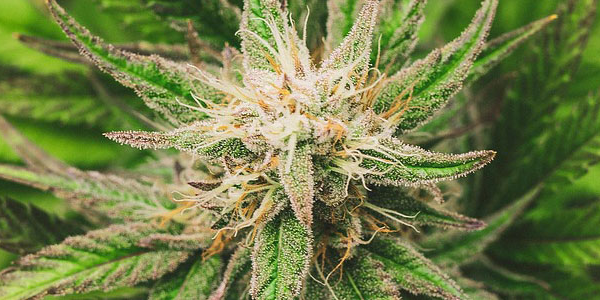
Step 7: The Flowering Stage (Week 8-16)
This is when your plants develop the buds you’ll eventually harvest!
Triggering Flowering
Photoperiod plants: Switch light schedule to 12 hours on, 12 hours off. The plant interprets this as the approach of fall and begins flowering.
Autoflowering plants: No action needed—they flower automatically based on age (usually around 3-4 weeks from sprouting).
Flowering Care
Lighting: Maintain strict 12/12 schedule for photoperiod plants. Even brief light exposure during dark periods can disrupt flowering.
Nutrients: Switch to bloom nutrients (high in phosphorus and potassium, lower in nitrogen).
Humidity: Reduce humidity to 40-50% to prevent mold on dense buds.
Watch for males: If you didn’t use feminized seeds, watch for and remove any male plants immediately (they have pollen sacs instead of pistils).
Flowering Timeline
- Weeks 1-3: Pre-flowering—plants stretch and show sex
- Weeks 3-6: Early flowering—buds begin forming
- Weeks 6-8+: Mid-to-late flowering—buds swell and ripen
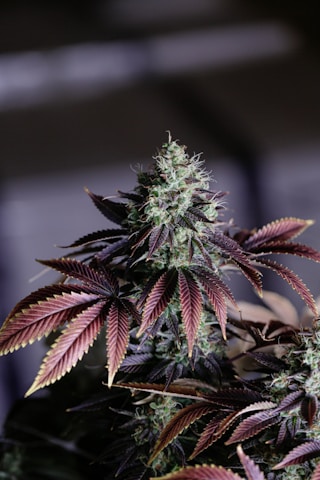
Step 8: Knowing When to Harvest
Harvesting at the right time is crucial for potency and effects. Here’s how to tell when your plants are ready:
Trichome Method (Most Accurate)
Using a jeweler’s loupe or microscope, examine the tiny crystal-like trichomes on the buds:
- Clear trichomes: Too early—plant still developing
- Cloudy/milky white trichomes: Peak THC—harvest for energetic effects
- Amber trichomes: Degrading THC to CBN—harvest for sedative effects
Ideal harvest window: 70-80% cloudy trichomes with 20-30% amber for a balanced effect.
Pistil Method (Easier for Beginners)
Look at the small hair-like pistils on the buds:
- When 70-90% of pistils have darkened and curled in, your plant is ready
Step 9: Harvesting and Drying
Harvesting
- Stop feeding nutrients 1-2 weeks before harvest (flush with plain water)
- Some growers keep plants in darkness for 24-48 hours before cutting
- Cut branches or the whole plant at the base
- Trim away large fan leaves
Drying Process
Critical for quality! Improper drying ruins even the best grown cannabis.
- Hang branches upside down in a dark room
- Maintain 60-70°F temperature and 45-55% humidity
- Ensure good air circulation (use a fan, but not directly on buds)
- Drying takes 7-14 days
- Buds are ready when small stems snap (not bend) when broken
Step 10: Curing for Maximum Quality
Curing develops flavor, smoothness, and potency:
- Place dried buds in airtight glass jars (Mason jars work great)
- Fill jars 75% full—don’t pack tightly
- Open jars once daily for 10-15 minutes (this is called “burping”)
- Monitor humidity—ideal is 58-62% (use humidity packs if needed)
- Cure for minimum 2-4 weeks (longer is better)
After curing, your cannabis will smoke smoother, taste better, and hit harder!
Common Beginner Mistakes to Avoid
1. Overwatering: The #1 newbie mistake. Cannabis roots need oxygen—waterlogged soil drowns them. Water only when the top inch of soil is dry.
2. Nutrient Overload: More nutrients does NOT equal bigger buds. Start with 25% recommended dose and increase gradually.
3. Wrong pH: Cannabis prefers soil pH of 6.0-7.0. If pH is off, plants can’t absorb nutrients even if they’re present.
4. Poor Light Conditions: Insufficient light = small, airy buds. Invest in quality lighting for indoor grows.
5. Harvesting Too Early: Patience! Wait for those trichomes to cloud over. Harvesting early dramatically reduces potency.
6. Inadequate Airflow: Stagnant air invites mold and pests. Always ensure good ventilation.
7. Ignoring Problems: Small issues become big problems fast. Address yellow leaves, spots, or unusual growth immediately.
8. Light Leaks During Flowering: For photoperiod plants, even a tiny bit of light during the dark period can stress plants or cause them to revert to vegetative growth.
Essential Equipment for Beginners
For Indoor Growing (Budget-Friendly)
- Grow tent: 2×2 or 3×3 feet ($100-200)
- LED grow light: 100-300W full spectrum ($80-250)
- Ventilation fan: 4-6 inch inline fan with carbon filter ($80-150)
- Containers: 3-5 gallon fabric pots ($10-30)
- Growing medium: Quality soil or coco coir ($20-40)
- Nutrients: Starter nutrient kit ($30-60)
- pH test kit: Digital or liquid ($15-30)
- Timer: For light scheduling ($10-20)
Total startup cost: $350-800
For Outdoor Growing
- Quality seeds: Feminized or autoflower ($30-100)
- Large containers or garden plot: 5-20 gallon pots ($20-50)
- Quality soil: Organic potting mix ($30-60)
- Nutrients: Organic fertilizer ($20-40)
- pH test kit: ($15-30)
- Optional: Small greenhouse or row covers for protection ($50-200)
Total startup cost: $165-480
Legal Considerations
Before you start growing, understand your local laws!
- Cannabis cultivation is legal for adults in many U.S. states, but rules vary widely
- Some states allow home growing, others don’t
- Plant count limits vary (typically 3-12 plants per household)
- Federal law still classifies cannabis as illegal, though enforcement policies vary
- Always check current state and local regulations before starting your grow
At JG Seeds, all our seeds are Farm Bill compliant (less than 0.3% THC) and legal to purchase. However, growing cannabis plants may not be legal in your jurisdiction. Always verify local laws.
Your First Grow Timeline
Here’s what to expect for a typical indoor autoflower grow:
- Week 0: Germination (3-7 days)
- Weeks 1-3: Seedling stage
- Weeks 3-6: Vegetative growth
- Weeks 6-10: Flowering
- Week 10-12: Final ripening
- Week 12: Harvest
- Weeks 13-14: Drying
- Weeks 15-18+: Curing
Total time from seed to smoke: 15-20 weeks
Photoperiod plants take longer (typically 4-6 months) but can yield more.
Tips for Success
Start Small: Don’t grow 10 plants on your first attempt. Start with 1-3 plants to learn the basics without being overwhelmed.
Keep a Grow Journal: Document everything—watering, feeding, problems, solutions. This information becomes invaluable for future grows.
Join Growing Communities: Online forums and social media groups are filled with experienced growers happy to help beginners troubleshoot problems.
Invest in Quality Seeds: Cheap, low-quality seeds lead to disappointing results. Premium genetics from reputable seed banks (like JG Seeds!) make growing easier and ensure better results.
Be Patient: Cannabis takes time to grow properly. Rushing the process (especially harvest timing) will hurt your final product quality.
Learn from Mistakes: Every grower makes mistakes, especially at first. View each challenge as a learning opportunity.
Next Steps: Ready to Start Your Grow?
Now that you understand the basics, it’s time to take action! Here’s your step-by-step plan:
1. Verify Local Laws: Ensure you’re legally allowed to grow in your location
2. Decide Indoor or Outdoor: Consider your space, budget, and climate
3. Choose Your Seeds: For beginners, we recommend:
- Autoflowering feminized seeds for easiest experience
- Hardy strains like Northern Lights or Blue Dream
- Starting with 2-3 seeds for your first grow
4. Gather Equipment: Purchase essential equipment based on your growing method
5. Start Germinating: Follow the paper towel method for best results
6. Document Everything: Keep notes and photos of your grow journey
7. Stay Connected: Join our growing community for support and advice
Frequently Asked Questions
Q: How much does it cost to grow cannabis at home? A: Initial setup ranges from $200-800 for indoor growing, less for outdoor. After that, costs are minimal—mainly nutrients and electricity.
Q: How long does it take to grow cannabis? A: Autoflowers take 8-12 weeks from seed to harvest. Photoperiod strains take 4-6 months.
Q: How much will my plant yield? A: First-time growers typically harvest 1-4 ounces per plant, depending on strain, growing method, and conditions. With experience, yields increase significantly.
Q: Can I grow cannabis in an apartment? A: Yes! Many growers successfully cultivate in apartments using small grow tents with proper ventilation and odor control (carbon filters).
Q: Do I need expensive equipment? A: No. While premium equipment helps, many successful growers start with budget-friendly setups and upgrade over time.
Q: What’s the best strain for first-time growers? A: Autoflowering feminized strains like Northern Lights, Afghan, or Blue Dream are extremely beginner-friendly.
Q: How do I control the smell? A: Carbon filters attached to exhaust fans effectively eliminate cannabis odors during flowering. Low-odor strains are also available.
Conclusion: You Can Do This!
Growing cannabis might seem intimidating at first, but thousands of beginners successfully grow quality cannabis every year—and you can too! The key is to start with quality genetics, follow basic principles, and be patient with yourself as you learn.
Remember: every expert grower was once a beginner who made mistakes and learned from them. Each grow teaches you something new, and you’ll be amazed at how quickly you develop your green thumb.
Ready to start your growing journey? Check out our selection of beginner-friendly cannabis seeds, all backed by our germination guarantee and growing support. We’re here to help you succeed from seed to harvest!
Happy growing! ????
Shop Our Best Seeds for Beginners
Browse our collection of easy-to-grow, high-quality cannabis seeds perfect for first-time growers. All seeds come with:
- ✅ Germination guarantee
- ✅ Discreet shipping
- ✅ Free growing support
- ✅ Farm Bill compliant (less than 0.3% THC)
[Shop Beginner-Friendly Seeds] | [View Autoflower Collection] | [Download Free Growing Guide]
Need help? Our growing experts are here to answer your questions. Contact us or join our community forum for personalized advice and support throughout your growing journey.
Disclaimer: This guide is for educational purposes in jurisdictions where cannabis cultivation is legal. JG Seeds promotes responsible, legal cannabis cultivation. All products contain less than 0.3% THC and comply with federal law. Check your local laws before growing cannabis. We accept no liability regarding cultivation laws in specific jurisdictions.